Channels and how to manage them
Channels organise the housing company’s conversations by topic. In this guide you’ll create a new channel and set who can see it and who can post.
Channel types
Section titled “Channel types”- Public channel — visible to all members of the housing company.
- Private channel — visible only to people added as channel members.
- Apartment channel — tied to selected apartments.
- External channel (Connect) — conversation with external participants via a shared link. See the separate guide External chat with a shareable link.
Create a new channel
Section titled “Create a new channel”- Open Communication from the left-hand menu.
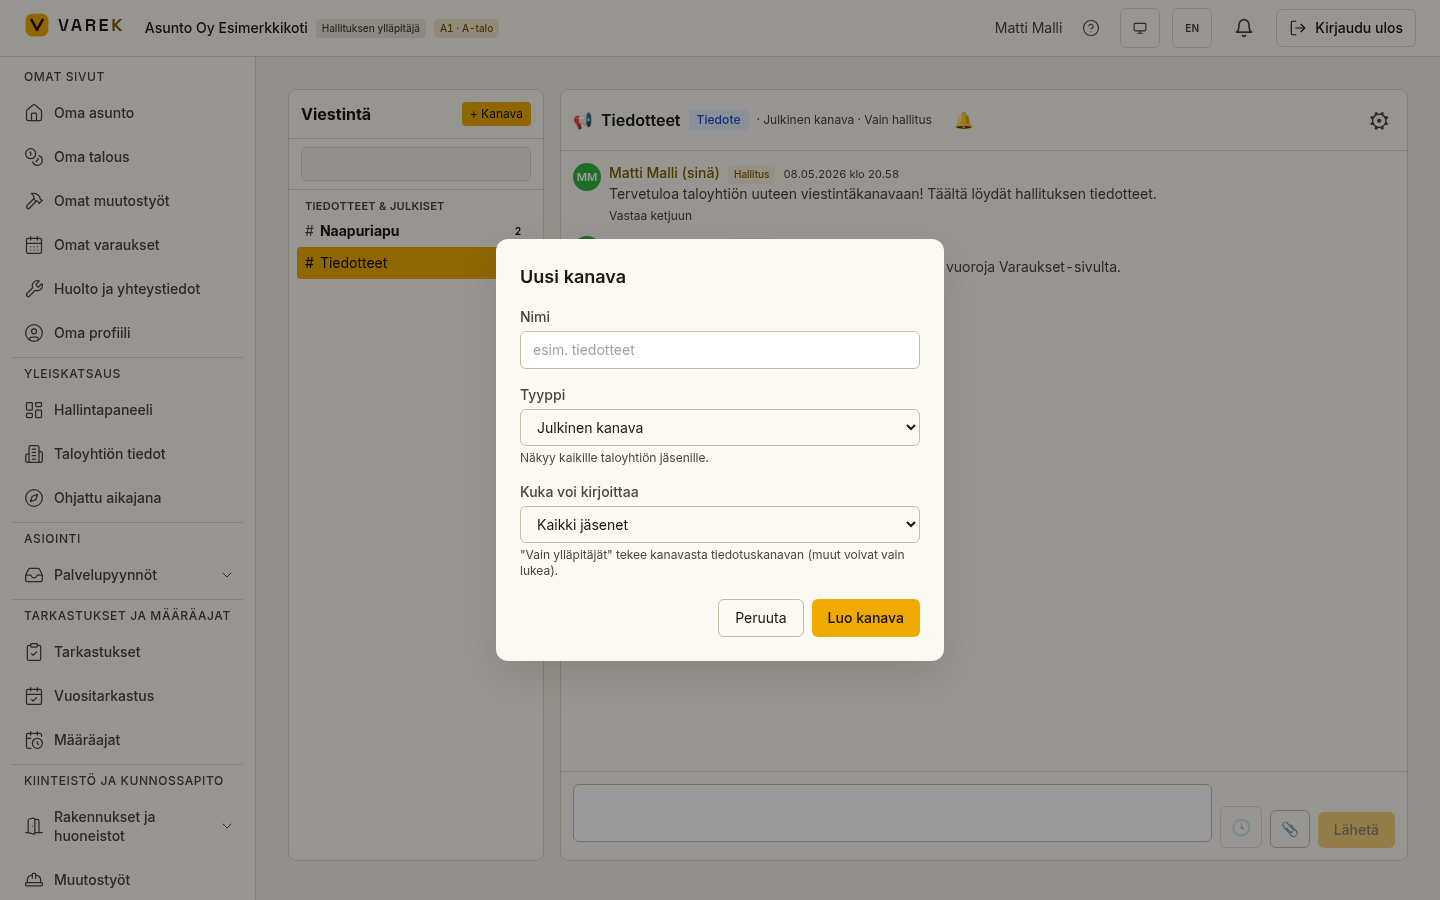
- Select the + Channel button at the top of the channel list (its tooltip is “Create channel”).
- Give the channel a name (e.g. “announcements”).
- Choose the Channel type. The helper text explains what each type means.
- If you chose an apartment channel, pick the apartments it covers from the list. You can use the Select all button.
- Choose Who can post: all members, board only, or admins only.
- Select Create channel.
The new channel opens ready for conversation.
Adjust channel settings
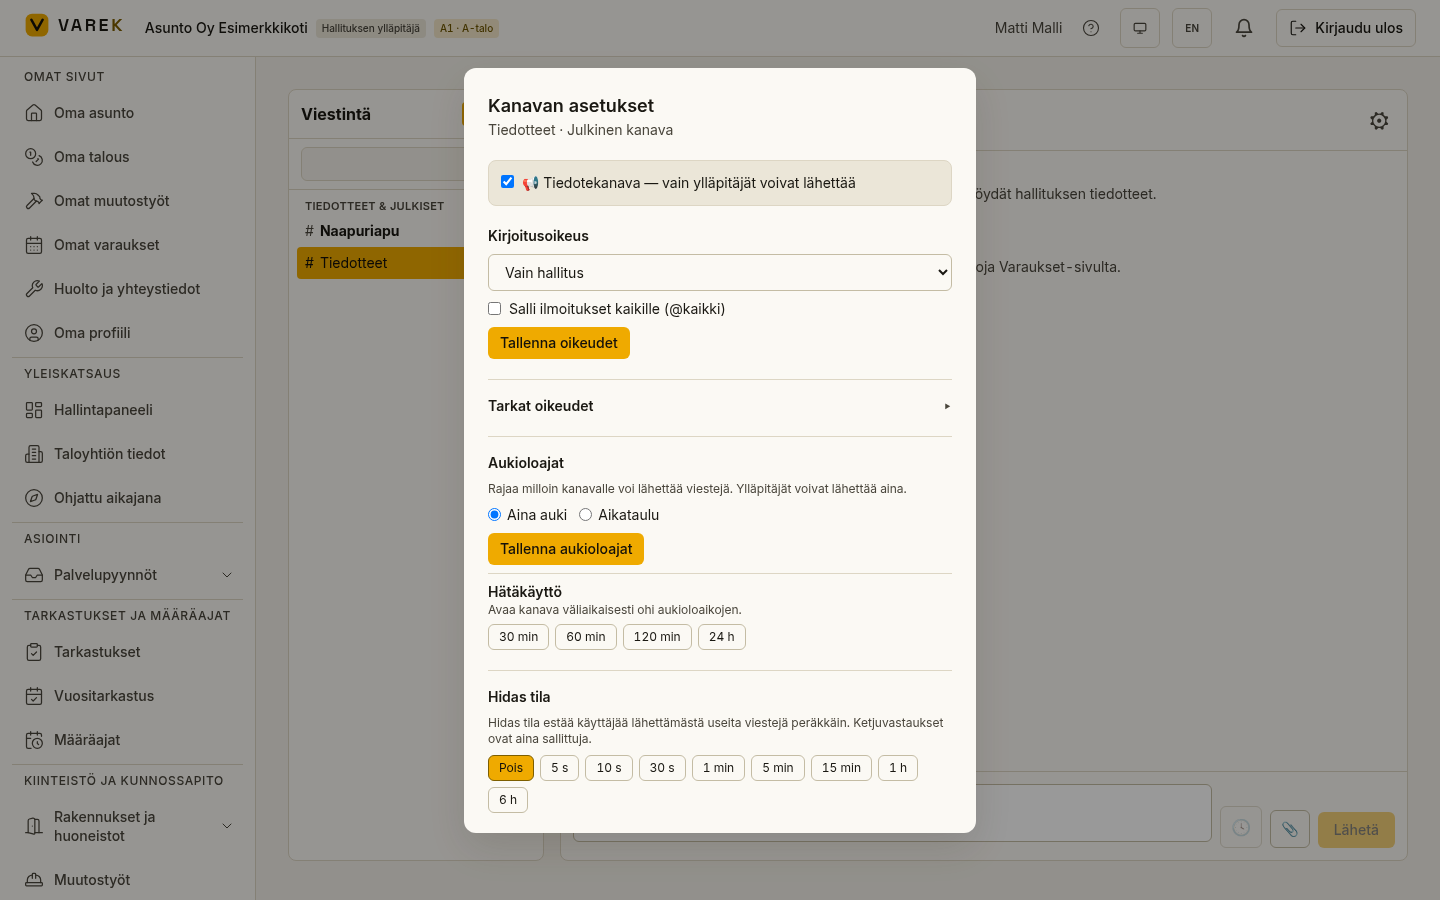
Section titled “Adjust channel settings”Open the channel and select the gear icon (⚙) at the right of the header row. In the settings dialog you can:
- change posting rights (all members / board only / admins only / specific people);
- allow
@kaikkialerts on the channel; - open the Detailed permissions section to fine-tune things like pinning,
attaching files and thread replies — including who may broadcast a thread
reply to the whole channel as an
@kaikkinotification (the “Broadcast thread reply to channel” permission; when it is not set separately, thread replies follow the channel’s normal@kaikkisetting); - set open hours and a slow mode for the channel;
- set a message retention period for the channel (housing-company admin only — see below);
- archive the channel.
Members of a private channel
Section titled “Members of a private channel”Private (and external) channels have their own member list. Open the channel settings and scroll to Members. Add a member by selecting a person and Add, or remove a member with the Remove button on the row.
Message retention
Section titled “Message retention”A housing-company admin can set a message retention period for a channel (channel settings → Message retention): No limit (default), 90, 180, 365 or 730 days. Once set, messages older than the period are permanently deleted by a once-a-day cleanup.
Deletion has three permanent exceptions: pinned messages and system messages (e.g. “channel created”) are always kept, and a thread starter is kept for as long as the thread has newer replies — an old conversation thread is never cut off in the middle. Every change to the retention setting is recorded in the channel as a system message.
Archive a channel
Section titled “Archive a channel”When a channel is no longer needed, open its settings and select Archive channel at the bottom. An archived channel can no longer be posted to, but its messages stay readable. The general channel can’t be archived.