Inspections
The inspection assistant guides the housing company’s important reviews item by item: what to check, how and why. Every shortcoming you find can be turned straight into a defect report, and a completed inspection produces a PDF report.
All inspections in one view
Section titled “All inspections in one view”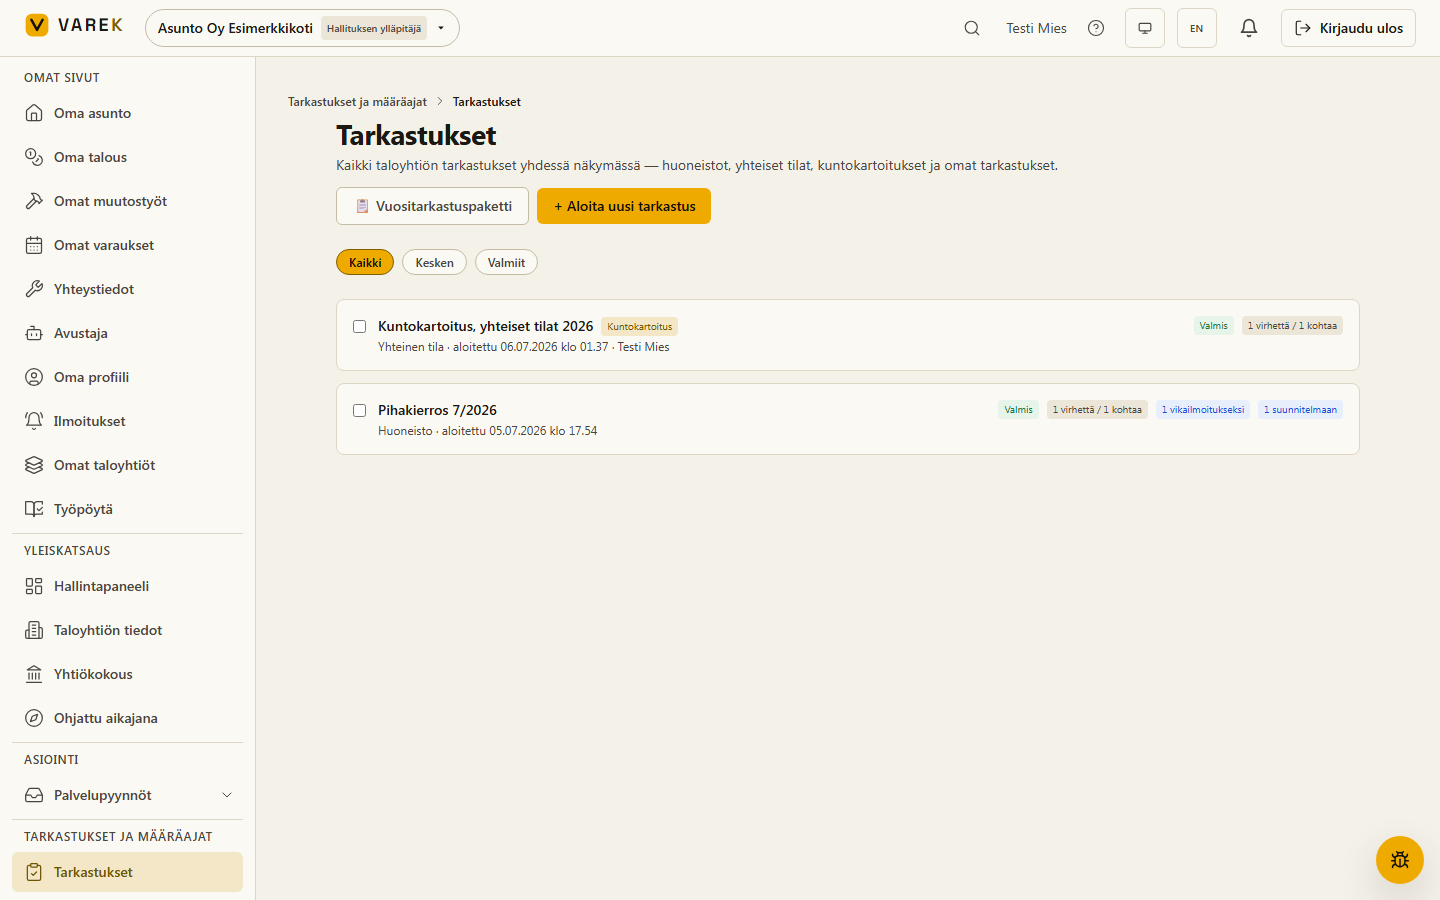
The Inspections page gathers all of the association’s inspections into one list — template inspections, custom inspections and condition surveys. Each row shows:
- the type (template name, custom-inspection title, or a Condition-survey marker),
- the target (apartment or common area) and inspector,
- the number of failures found and how many findings have already become a defect report or been added to the maintenance plan,
- a campaign link when the inspection belongs to an annual-inspection drive.
Use the filter buttons (All / In progress / Completed) to narrow the list by inspection status. The annual-inspection packet is still available from the top bar. On the maintenance plan (PTS), project rows also show a From inspection marker for items added from an inspection finding.
Available inspection templates
Section titled “Available inspection templates”VAREK has ready-made inspection templates for the stages of an RS property’s lifecycle, including:
- Move-in inspection (apartment) — a thorough review at move-in.
- One-year inspection (apartment) — the 1-year inspection; after this the builder’s liability is substantially limited.
- Common-area templates such as stairwell, ventilation plant room, façade and yard and fire-safety review.
- 10-year inspection — a hidden-defect survey before the 10-year liability ends.
Start a new inspection
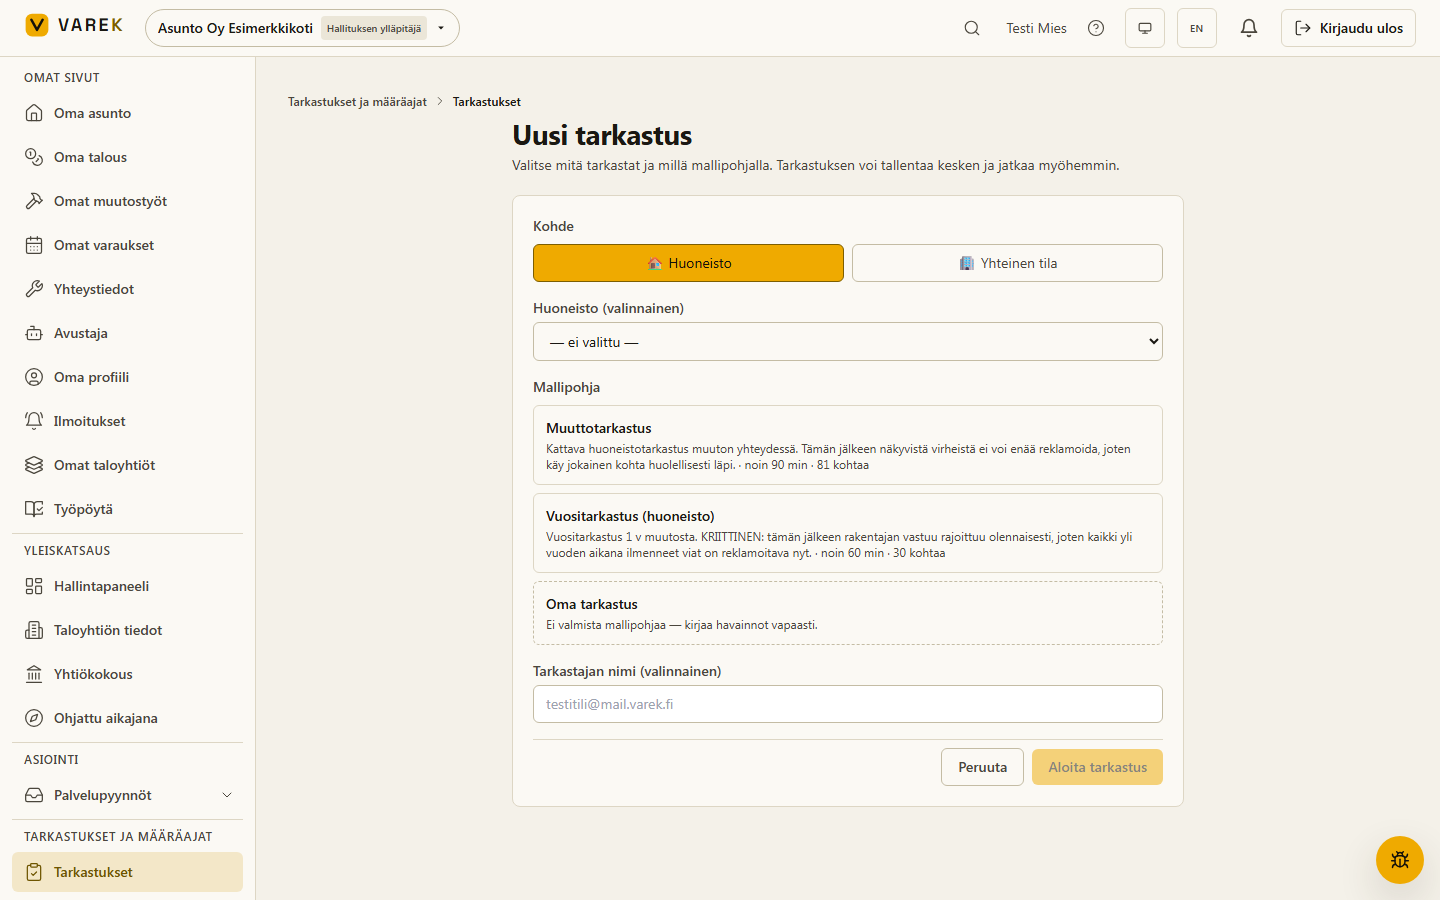
Section titled “Start a new inspection”- Open Tarkastukset (Inspections) and choose Aloita uusi tarkastus (Start a new inspection).
- Choose the target: an apartment or a common area.
- For an apartment inspection you can choose the apartment to inspect (optional).
- Choose an inspection template — or Oma tarkastus (Custom inspection, see below). Each template shows an estimated duration and the number of items.
- Optionally add the inspector’s name.
- Press Aloita (Start). You go to the inspection assistant.
Custom inspection (freeform)
Section titled “Custom inspection (freeform)”If no ready-made template fits, choose Oma tarkastus (Custom inspection) and give it a name. The assistant then shows no fixed checklist; instead you add findings yourself: each finding gets a title and, optionally, a category, a severity, a note and photos. A finding can later be edited or deleted, and it can be turned into a defect report the same way as a template item.
Work through the items with the assistant
Section titled “Work through the items with the assistant”The assistant splits the inspection into rooms (left-hand sidebar) and their items. For each item:
- Choose the status: OK, Failure or N/A (—).
- Open Näytä ohje (Show help) to read how and why the item is checked, plus any regulatory reference and a photo hint.
- Record your observation in the free-text field.
- Add photos of the item — including straight from the camera on mobile.
Progress and the number of failures found are shown in the top bar. Changes are saved automatically.
Turn a shortcoming into a defect report
Section titled “Turn a shortcoming into a defect report”When you mark an item as Failure (or add a finding in a Custom inspection), you can create a defect report from it with one click. VAREK pre-fills the title, category and severity from the finding. The created defect links back to the inspection item, and you can open it directly from the item’s link.
The defect won’t duplicate: pressing create again opens the same defect that was already created. The defect page shows a “From inspection” link back to the source inspection.
Finalize and create the report
Section titled “Finalize and create the report”- Once you’ve worked through the items, press Viimeistele (Finalize). If some items are still pending, VAREK confirms whether you want to finalize anyway.
- VAREK compiles a PDF report from your findings and saves it to the housing company’s documents.
- The completed inspection appears in the inspection list with the status Valmis (Completed).
To support the one-year inspection, you can also download a summary packet from the inspection list.
Annual-inspection drive
Section titled “Annual-inspection drive”When the housing company’s annual-inspection collection drive is running (the Vuositarkastus page), you can start an apartment annual inspection straight from the drive:
- Open Vuositarkastus and press Aloita vuositarkastus (Start annual inspection).
- The new inspection opens with the Annual inspection (apartment) template preselected. Choose the apartment to inspect and press Aloita (Start).
- The inspection is linked to the drive: the drive summary now counts, per apartment, the completed inspections and their detected defects alongside the reported defects.
This lets you see at a glance which apartments have already been inspected and where defects were found — even when an inspection produced no defect reports. Defect collection and reminders keep working as before.