Buildings and apartments
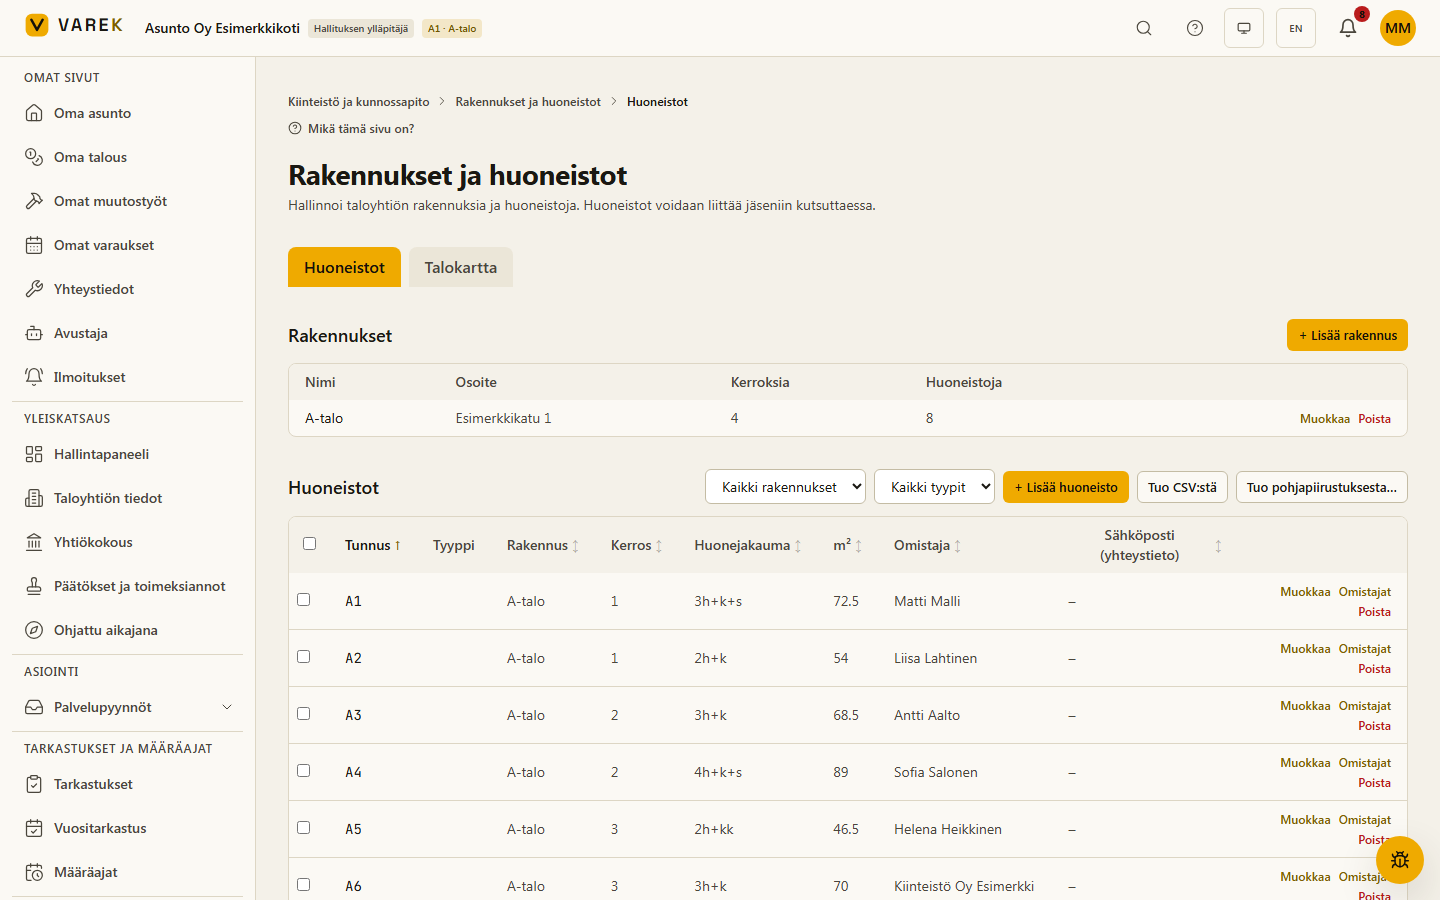
Buildings and apartments form the structure of the association, to which defect reports, resident invoices and ownerships are attached. Add the buildings first and then the apartments to each building.
Add a building
Section titled “Add a building”- Open Buildings and apartments from the left-hand menu.
- Choose Add building (“Lisää rakennus”).
- Give the building a name (required) and, if you wish, an address and a number of floors.
- Save.
Add an apartment
Section titled “Add an apartment”You need at least one building before you can add apartments.
- In the Apartments section, choose Add apartment (“Lisää huoneisto”).
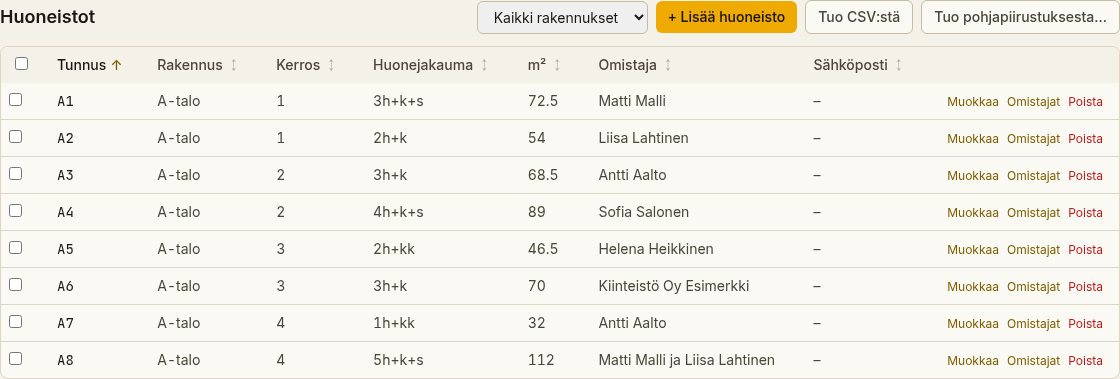
- Pick a building and give the unit code (e.g. A1). You can also add the floor, room count, area, and the owner’s contact details (name, email, phone). The contact fields are free-form — the official ownership register is recorded via the row’s Omistajat (Owners) action (see Apartment ownerships).
- Save.
The list’s Omistaja (Owner) column prefers owners recorded in the ownership register; if an apartment has none, it shows the contact and a small yhteystieto (contact) badge.
You can filter the apartment list by building using the menu at the top of the list.
Import apartments in bulk
Section titled “Import apartments in bulk”For a large property, importing apartments is faster than typing them in:
- Import CSV (“Tuo CSV”) — read apartments from a CSV file.
- Import from floor plan (“Tuo pohjapiirroksesta”) — extract apartments from a floor plan document.
Unit types (car bays, motorcycle bays, storage units)
Section titled “Unit types (car bays, motorcycle bays, storage units)”When you add or edit an apartment row you can select a unit type:
| Type | Description |
|---|---|
| Asunto (Apartment) | A residential apartment (default) |
| Autopaikka (Car bay) | A car parking space |
| MC-paikka (Motorcycle bay) | A motorcycle or moped parking space |
| Varasto (Storage) | A storage room or locker |
| Muu (Other) | Any other separate unit |
The type is displayed as a type badge on each row of the apartments list. A type filter at the top of the list lets you show only car bays, storage units, or any other specific type.
Car bays, motorcycle bays and storage units follow exactly the same ownership logic as apartments: a shareholder can own several units of different types, and each unit gets its own code (e.g. AP3, V12) via the normal ownership flow.
Bulk actions
Section titled “Bulk actions”Select apartments using the checkboxes in the table to enable bulk actions: you can delete the selected apartments or move them to another building.
Building map (Talokartta)
Section titled “Building map (Talokartta)”The building map is a curated set of floor-plan views, assembled by the board,
that members see on the Building map page (/talokartta). Members see only
the views the board has curated — not the entire document archive. Each view is
linked to a document and carries a descriptive title (e.g. “1st floor, yard
area”). The board adds and orders the views on the page itself.
For admins, the building map opens from the Talokartta tab on this page:
the Buildings and apartments page has two tabs at the top, Huoneistot
(Apartments) and Talokartta (Building map). Other members — such as board
members without admin rights, and shareholders — still reach the building map as
its own Talokartta menu item (/talokartta).
A building-map view is company-wide, so its document must be visible to every member. When you add a document whose visibility is restricted (for example, to the board only), you get a warning and can make the document visible to the whole housing company in the same step. If you leave it restricted, members see a “(not visible to you)” notice for that view — so they are told clearly that the document is restricted, not deleted.
Mark apartment boundaries on the floor plan
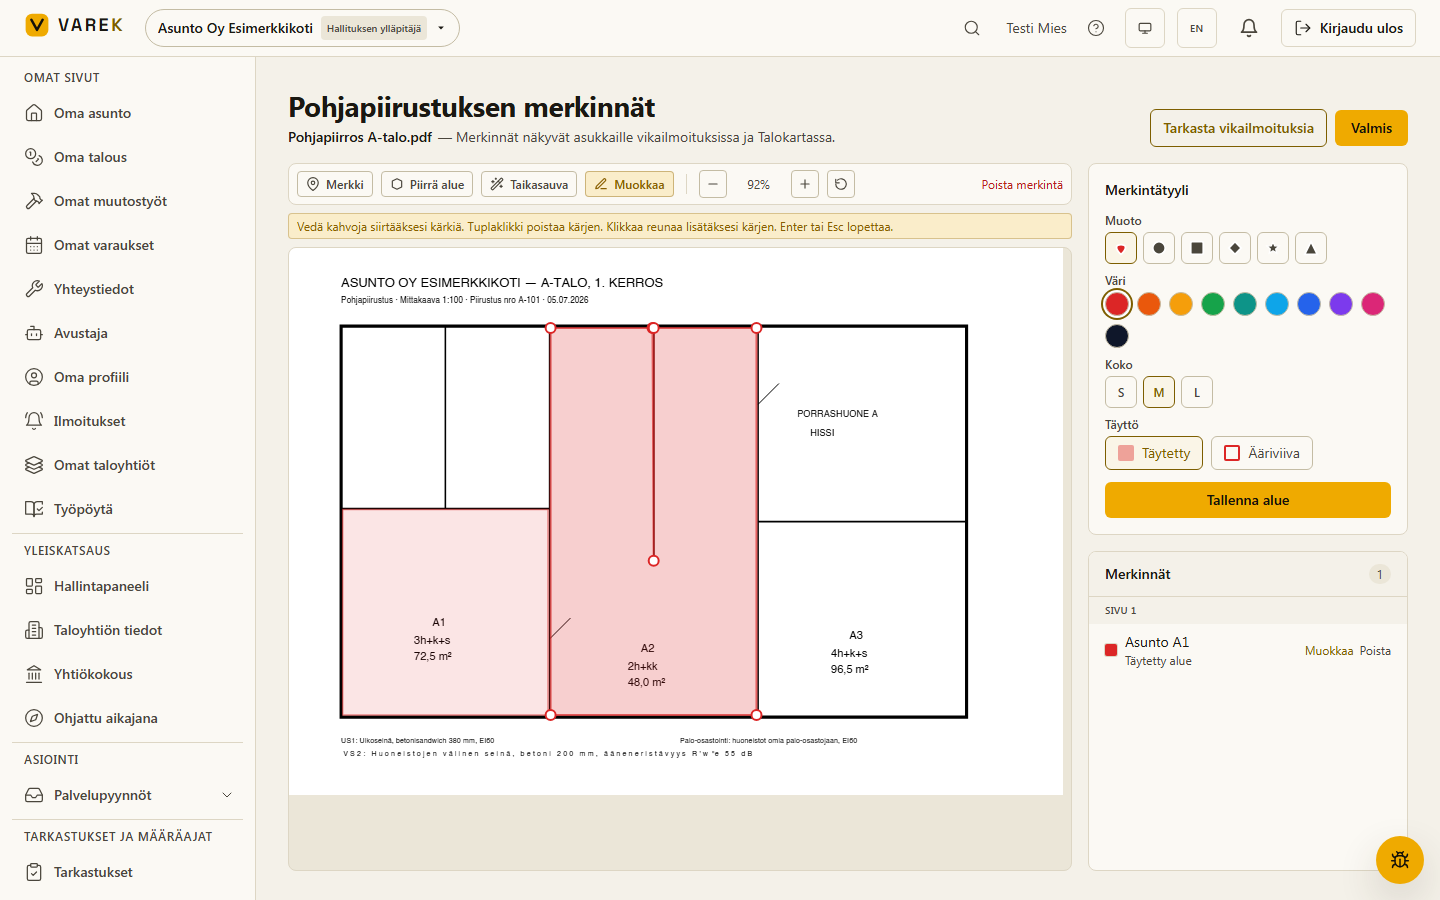
Section titled “Mark apartment boundaries on the floor plan”You can mark apartment and room boundaries, as well as individual markers, on a floor plan. Open a floor-plan document and go to the Floor plan annotations (“Pohjapiirustuksen merkinnät”) view. The editor toolbar has three drawing tools:
- Marker (“Merkki”) — tap a single point (e.g. a location).
- Draw area (“Piirrä alue”) — draw a boundary by tapping vertex by vertex.
- Magic wand (“Taikasauva”) — detects the walls and proposes a boundary automatically.
Magic wand
Section titled “Magic wand”When you pick the Magic wand tool and tap inside a room or apartment, VAREK renders the floor plan to its own offscreen buffer, detects the surrounding walls and proposes a ready-made polygon boundary. The proposal opens straight in edit mode, where you can drag vertices, add a vertex by tapping an edge and remove a vertex with a double-click — then save as usual (name, colour, style).
The wand is an assistant, but you always check the result yourself. If detection doesn’t succeed you get a clear hint:
| Message | What to do |
|---|---|
| ”Click inside the room, not on a wall.” | You tapped on a wall — tap inside the open space. |
| ”No area detected…” | Try a more open spot, or draw the boundary manually with Draw area. |
| ”The area leaked through a door opening.” | The boundary escaped through a doorway. VAREK automatically tries once to widen the seal; if it still spreads too far, draw it by hand. |
On complex or scanned drawings, drawing by hand is always the guaranteed fallback. For a multi-room apartment, tap the wand once per room and give each boundary the same apartment name.