A systematic inspection of a new apartment: test every season before the warranty period ends
Inspecting a new-build apartment is not a one-off task. Many construction defects only come to light under particular conditions — in freezing weather, during snowmelt, or in summer heat — so the apartment must be tested systematically across the whole warranty period, not only in the final run-up to the annual inspection. This guide explains how to go through your apartment one season at a time and one room at a time, so that every defect is on record before the warranty window closes.
Why a systematic inspection is worth doing
New apartments often have defects that are invisible at first glance. They emerge only when the structure is put under stress in the right conditions: heating when it is freezing outside, the roof under heavy rain, ventilation on a hot day. A quick walk-round at move-in is not enough to expose these problems — which is why inspections should be spread across the seasons and all findings gathered into one list.
Timing also has legal significance. During the warranty period (generally two years from completion), a presumption of defect applies: the burden of proof lies with the builder. The key practical milestone is the annual inspection, which must take place no earlier than 12 months and no later than 15 months after the building is taken into use (Housing Transactions Act, chapter 4 section 18): after the annual inspection, visible defects that were never logged become very difficult to claim against. The formal burden of proof passes to the housing company at the end of the warranty period. For more detail, see: Warranty period and ten-year liability.
Note that the annual inspection is organised by the developer/builder under a statutory obligation — the housing company and individual shareholders attend and present their compiled defect lists. The practical conclusion is straightforward: the more conditions you manage to test before the annual inspection, the more comprehensive your defect list will be — and the stronger the position your housing company stands in. Material starts accumulating from the move-in inspection onwards.
Test every season
Build your inspection around the cycle of the year. Once you have gone through the property in all four conditions, you will have seen it in the situations where each defect type typically shows itself.
| Season | What to test |
|---|---|
| Winter (frost) | Adequacy and evenness of heating; cold radiators; window and door draughts; condensation and misted glass; cool patches in the floor; snow and ice run-off from eaves |
| Spring (snowmelt) | Drainage and slopes on paths and balconies; performance of land drains and rainwater systems; snowmelt directed away from the building; damp marks on the plinth and in basement spaces |
| Summer (heat) | Adequacy of ventilation; performance of cooling; overheating in apartments; smells from drains and ventilation ducts; durability of terrace and balcony surface materials |
| Autumn (rain, first frosts) | Airtightness of the building envelope and window draughts; roof and gutters under heavy rain; downpipe discharge; moisture in external walls and junctions |
Tip: keep a single running defect list throughout the year and note the date and weather conditions for every observation. A draughty window logged in winter and the same observation logged again in autumn reinforce each other.
The divisions are not hard boundaries — many things are worth checking more than once. The important thing is that no seasonal condition goes untested before the annual inspection.
Room-by-room checklist
Alongside the seasonal testing, go through every room systematically. Below are the key points for each space.
Wet rooms
Wet rooms are the highest-risk area in a new build: a waterproofing defect may not become apparent for years and can lead to repair costs running into tens of thousands of euros. See also: Water damage in a new apartment.
- Floor fall to the floor drain: pour water into the far corner and check that it flows to the drain without pooling.
- Tile-tap test: tap all floor and wall tiles. A hollow, dull sound indicates a loose tile.
- Signs of waterproofing at the threshold and at the wall-to-floor junction (waterproofing must meet the requirements of the Finnish moisture regulations, YMa 782/2017).
- Silicone joints in corners, shower cubicle corners, around the basin, and at the base of the WC pan — intact, without bubbles or cracks.
- Extract ventilation draws: a sheet of tissue paper should cling to the grille under its own weight.
- Surface moisture in walls and floors at different times of year, if you have a moisture meter.
Kitchen
- Basin and dishwasher connections: wipe dry, run water for a moment, and check for residual moisture.
- Worktop joints to the wall and basin — intact.
- Hot water arrives within a reasonable time and at a sufficient temperature.
- Sockets, earthing, and the residual-current device work — test the RCD using its test button.
- Cabinet doors are in line and close without effort.
Living rooms and bedrooms
- Floor evenness: humps, creaks, and gaps at skirting boards. Check straightness with a spirit level or laser.
- Cracks in walls and ceilings — diagonal cracks running from the corners of door openings in particular can be a sign of structural movement.
- Window seals, locks, and condensation: misting between the panes of a sealed unit means the unit has failed. Feel for draughts in winter and autumn.
- Evenness of heating: no cold radiators or cool patches in the floor.
- Smoke alarm works — test with the test button.
Balcony
- Floor fall outwards or to a drain; drain performance during snowmelt and rainfall.
- Balustrade fixing and height.
- Balcony glazing slides and closes correctly.
- Durability of surface materials in summer heat and winter frost.
Common areas
- Stairwells, corridors, and plant rooms: lighting, doors, airtightness, and damp marks.
- Fire compartmentation and fire-safety signage intact — these are the board’s responsibility in addition to apartment-level checks.
- External areas, plinth, and land drains: water directed away from the building; no pooling against walls.
- Roof, eaves, and downpipes: performance during heavy rain and snowmelt.
A summary of the most commonly detected defects can be found here: The most common construction defects in new buildings.
Tools
You do not need professional equipment. A few inexpensive items make the inspection noticeably more reliable:
- A torch or phone light — for corners, joints, and the inside of cupboards in raking light.
- A spirit level or laser — for checking floors, skirting boards, and door frames.
- A tape measure — for documenting slopes, heights, and dimensional deviations.
- A small metal object — for the tile-tap test.
- A surface moisture meter (optional) — for monitoring wet rooms and suspicious areas across different seasons.
When a finding looks serious or the question of liability is unclear, it is worth considering an independent specialist: When does a housing company need an external building expert?
Log findings immediately
A checklist alone is not enough — the decisive step is documenting each defect the moment you notice it. Photograph every deviation, note its location, a description, the date, and the conditions in which the fault appeared. A date-stamped photograph is the single strongest piece of evidence, and recording the right conditions (winter frost, spring snowmelt) helps demonstrate what caused the defect.
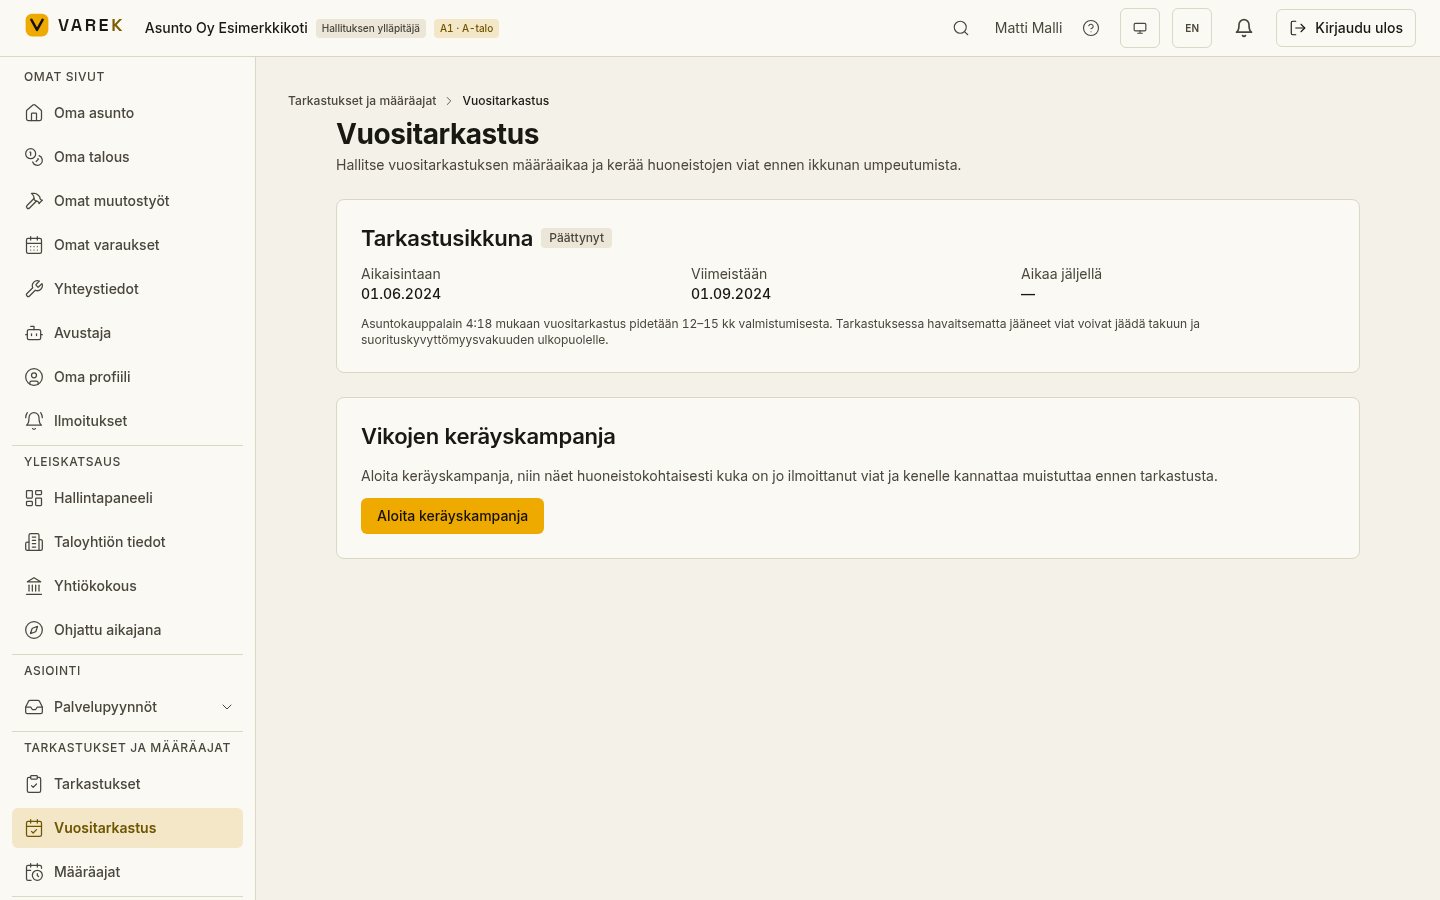
The VAREK annual inspection view displays the deadline under the Housing Transactions Act, chapter 4 section 18, and brings all logged defects together into a single list ready for formal notification.
A systematic inspection spread across all four seasons generates a large volume of observations — and a scattered list of phone notes will not hold up in a formal defect claim. Log every finding in the same place as soon as you make it, and do not rely on memory. In VAREK you can collect defect reports, photographs, and notes in one place, then compile the formal notification at the click of a button. The principles of good documentation are covered here: How to document a construction defect correctly.
Time your inspection correctly
The power of a systematic inspection lies in timing. Plan it as follows:
- Start from the moment the building is complete. Collect defect reports continuously and remind residents to test things across different seasons.
- Work through every season. Note which conditions you have already tested so that none is missed before the annual inspection.
- Carry out a thorough consolidating round approximately two to three months before the annual inspection deadline (the 15-month outer limit). This gives you time to repeat any ambiguous observations and add to the list before the inspection.
- Bring everything together into a single list well in advance of the annual inspection and prepare the formal notification in writing, with defects categorised and photographs attached. Use the annual inspection checklist as a guide.
This way you avoid a last-minute rush, and every defect uncovered by a change of season is on record before the annual inspection and before the warranty period ends.
Start your apartment inspection in VAREK
A systematic inspection delivers the best results when observations are kept in order across the whole warranty period. VAREK guides you room by room, reminds you of critical checkpoints, tracks the annual inspection deadline, and brings your collected defects together into a list ready for formal notification — season after season.
Contact us and make sure no defect in your new building goes unrecorded before the warranty period ends.
This is general guidance, not legal advice. The exact deadlines and procedures for inspections and formal notifications depend on the contract and the specific situation — consult a lawyer or a qualified expert if in doubt.
Frequently asked questions
Why should a new apartment be inspected across different seasons?
Many construction defects only reveal themselves under specific conditions. Heating and draught problems show up in freezing temperatures; drainage and slope defects appear during snowmelt and heavy rain; overheating and inadequate cooling become obvious during a summer heatwave; and window draughts emerge with the first autumn frosts. A single walk-through will not catch all of these. That is why defects should be logged continuously throughout the warranty period — not just in the final weeks before the annual inspection.
When is the annual inspection of a new building carried out?
The annual inspection must be held no earlier than 12 months and no later than 15 months after the building is taken into use (Housing Transactions Act, chapter 4 section 18). It is the last straightforward opportunity to log visible defects — after the inspection, visible defects that were not recorded become much harder to claim against. The formal burden of proof shifts to the housing company at the end of the warranty period (generally two years from completion). Start compiling your defect list well in advance of that deadline.
What tools are needed to inspect an apartment?
You can go a long way with basic equipment: a torch or your phone light for corners and joints in raking light; a spirit level or laser for checking floors and skirting boards; a tape measure for documenting dimensions; and a small metal object for the tile-tap test. A surface moisture meter is helpful for monitoring wet rooms. Any serious concerns should be confirmed by a qualified building expert.
Who is responsible for defects during the warranty period?
During the warranty period (generally two years from completion) the burden of proof rests with the builder: it must demonstrate that a detected fault does not stem from a construction defect. At the end of the warranty period the burden of proof shifts to the housing company. After the annual inspection, visible defects that were never logged become much harder to claim against — which is why all observations must be recorded by that point at the latest. Once the warranty period has expired the builder can in practice only be held liable for latent defects; liability for latent defects continues for ten years from the transfer of administration (hallinnon luovutus). This is why defects must be recorded and formally notified in good time.
Is it enough to inspect the apartment once at move-in?
No. The move-in inspection is the first and most important moment to record visible defects, but many faults only appear during everyday use and under varying conditions. A systematic inspection spread across all four seasons will uncover significantly more defects than a single walk-through, and will give you a comprehensive list for the annual inspection.